Hiking Chile’s Arco Iris trail currently reigns with many superlatives for us. The trek up Cerro Arco Iris was definitely the most challenging one-day hike we’ve ever been on, without question the most technical, and certainly one of the most stunning.
When it comes to trekking in Chile, it’s the routes around Torres del Paine National Park that seem to get all the love. And rightfully so. We’ve hiked the “W” and it was nothing short of amazing.
The Most Terrifying Trek You’ve Never Heard Of
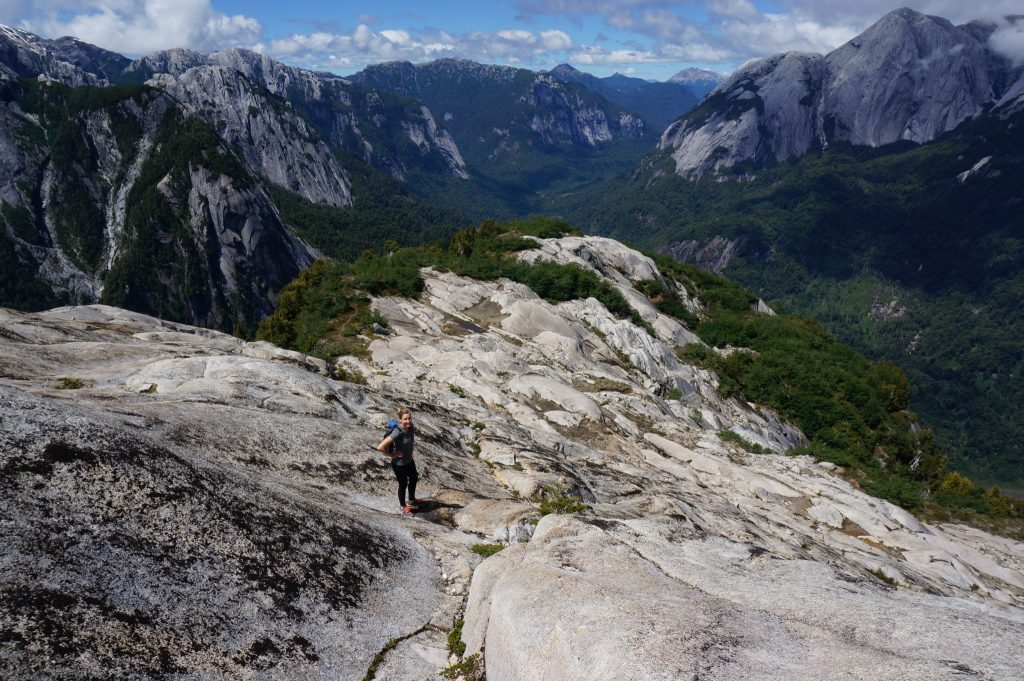
 Yet it was this trek atop Cerro Arco Iris that took things to new heights, literally. And during our visit, we only saw one other group on the trail which is in stark contrast to the often crowded Torres del Paine treks.
The Arco Iris trail is relatively new. Adventurous souls have been making use of the insane ‘path’ since it was created in 2007, presumably by some sort of evil geniuses. While Arco Iris is a relative newcomer to the trekking scene, word is beginning to spread about its awesomeness.
While in the valley, we heard rumors about building a road here, which will certainly change things completely. So this is definitely one of those places to go see now!
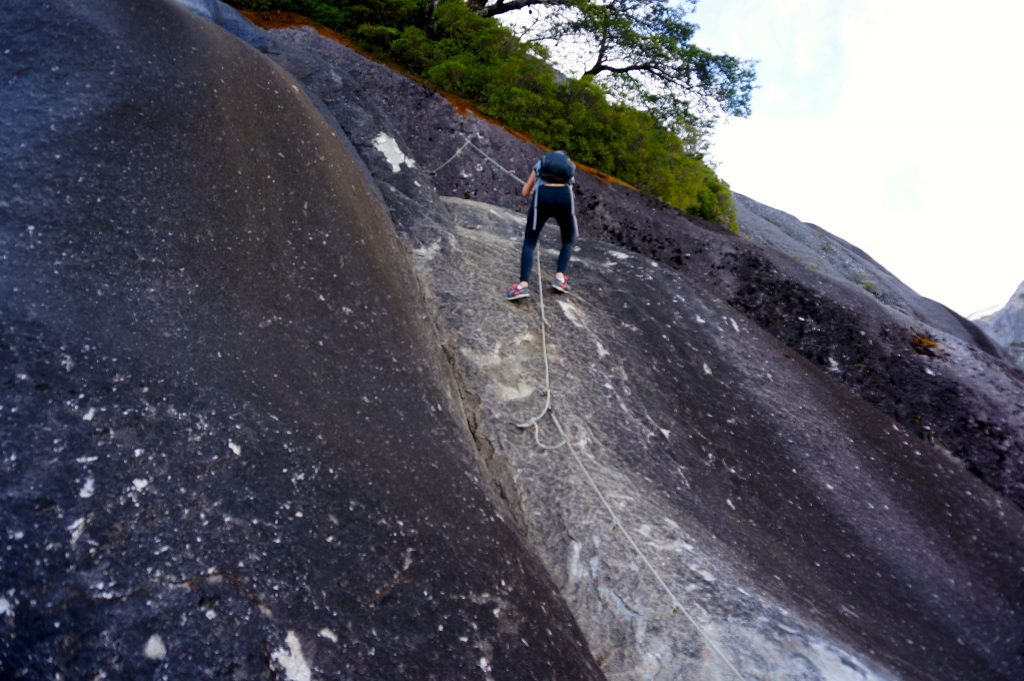
It is an absolutely incredible trek that takes you from dense humid tropical forests to snow capped mountain peaks within the span of just a few hours. You spend a good portion of the trail simply clambering to the side of mountain cliffs. There’s no harnesses and eventually no ropes, just an insane free climb.
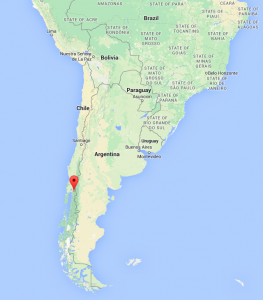
Getting to the Cerro Arco Iris Trailhead in Río Cochamó Valley
Although the Arco Iris trail itself is a one-day hike, to get to the Arco Iris trailhead you must first bus several hours to the small town of Cochamó, then set out on a 12 km, four-hour hike to reach the serene Cochamó Valley. So to hike Arco Iris, you’ll need a minimum of three full days: one to get there, one for the trek itself, and one to return.
The hike into the Río Cochamó Valley is a scenic one, mostly flat, on the valley floor, through dense forest, across rivers, and looming mountain peeks that surround. Once you reach the valley, you’ll understand why it’s often referred to as the “Yosemite of South America.”
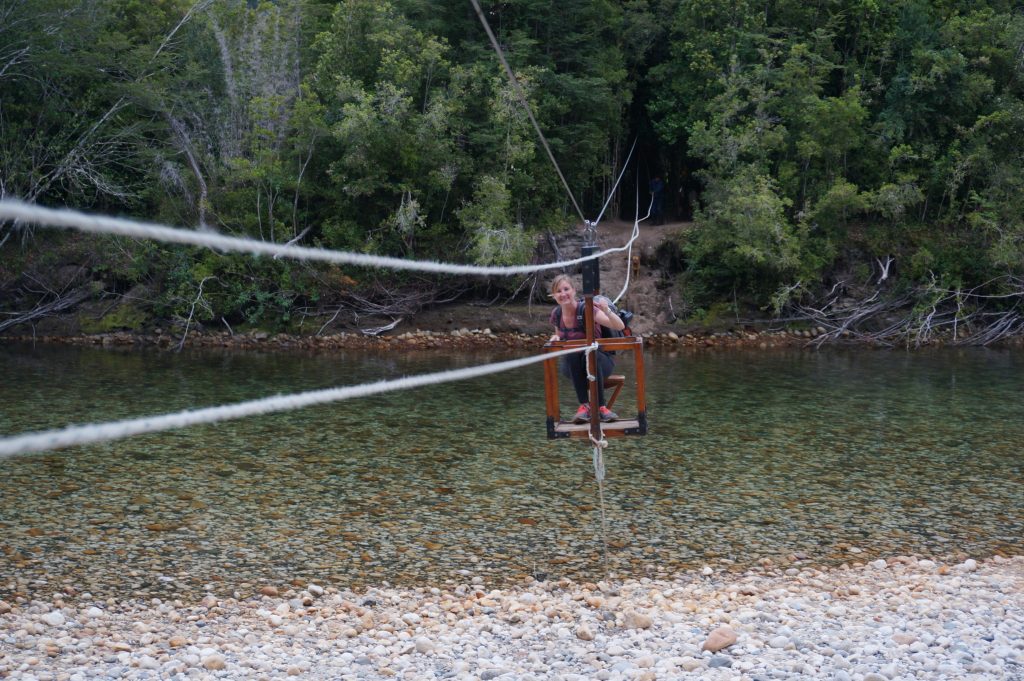
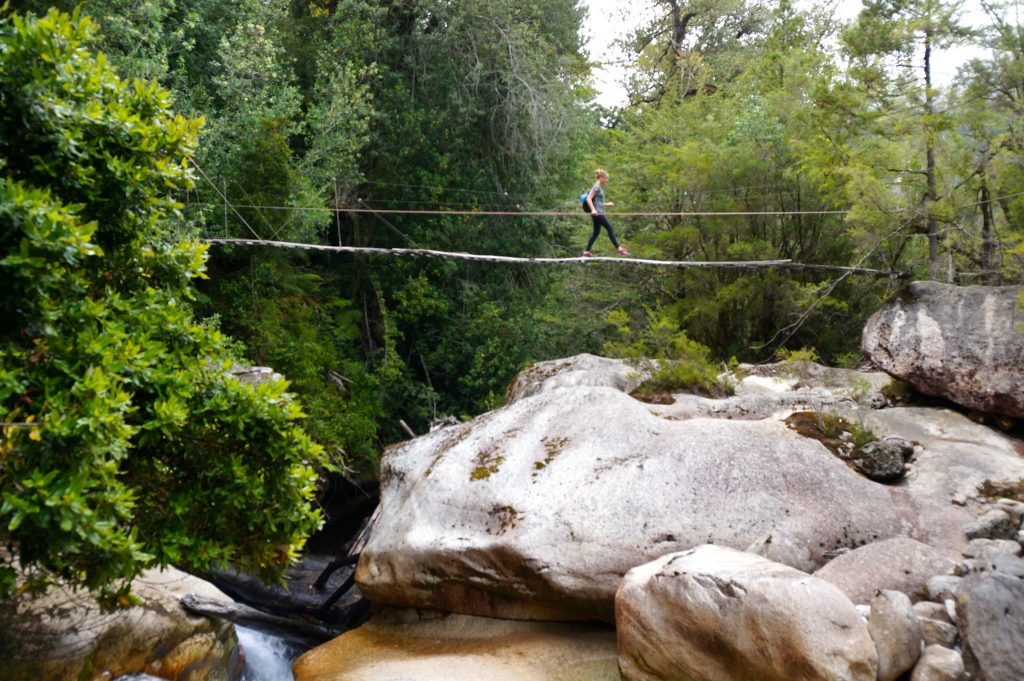
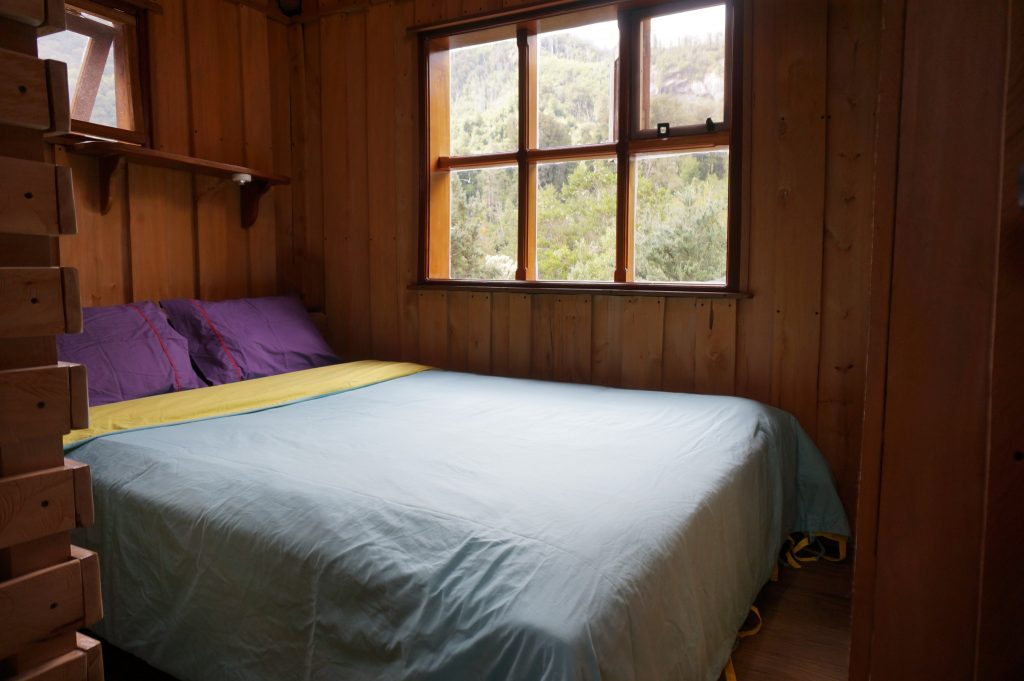
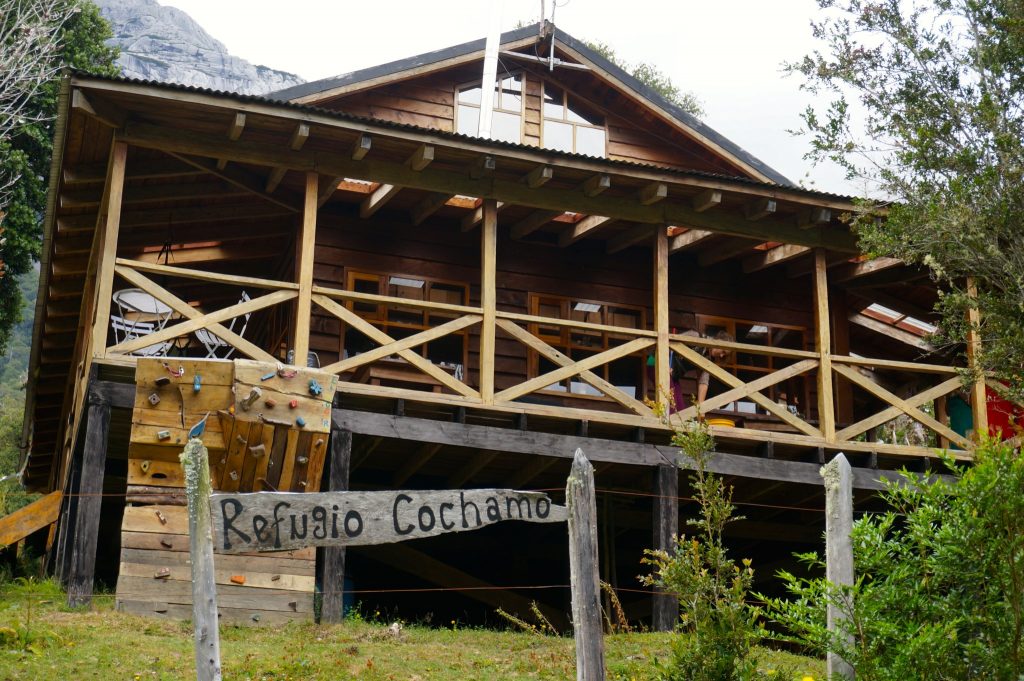
It is here in a part of the Río Cochamó Valley known as La Junta where you’ll want to set up camp or stay at the cozy nearby refugio, Refugio Cochamó. We’d recommend opting for the latter. The refugio will make you a nice carb-rich pizza and provide you a solid night’s rest to give you the energy you’ll need for the challenge that awaits you the following day. To make things even more fun, you’ll need to use their crazy pulley system in order to reach the refugio.
The next day, it is advisable to depart pretty early to ensure you give yourself enough time to complete the entire Arco Iris hike.
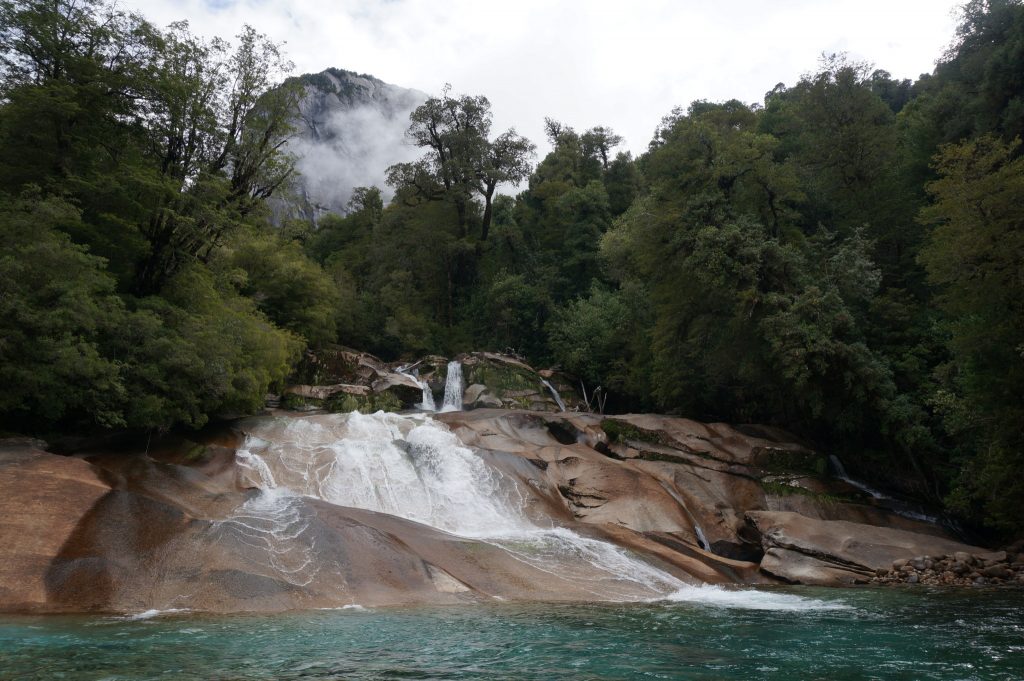
A Wild Waterslide: La Junta Cascades
Leaving from the wide-open La Junta campground, you have the option to pass by the Cascades, taking a trail a bit to the North side of camp. This is only about a 10-minute detour from the Arco Iris trail, so it’s worth stopping by along the way. If these Cascades are of any interest to you, be sure to go by on the way up because you will be too tired to have look upon descending.
Its a nice little detour and some crazy people slide down the falls like a waterside! After a quick look around the cascades, hike upward and onward, across the swing bridge, and you will see a signed fork in the road that connects with the trail to Arco Iris. Your adventure begins.
Over the River and Through the Woods
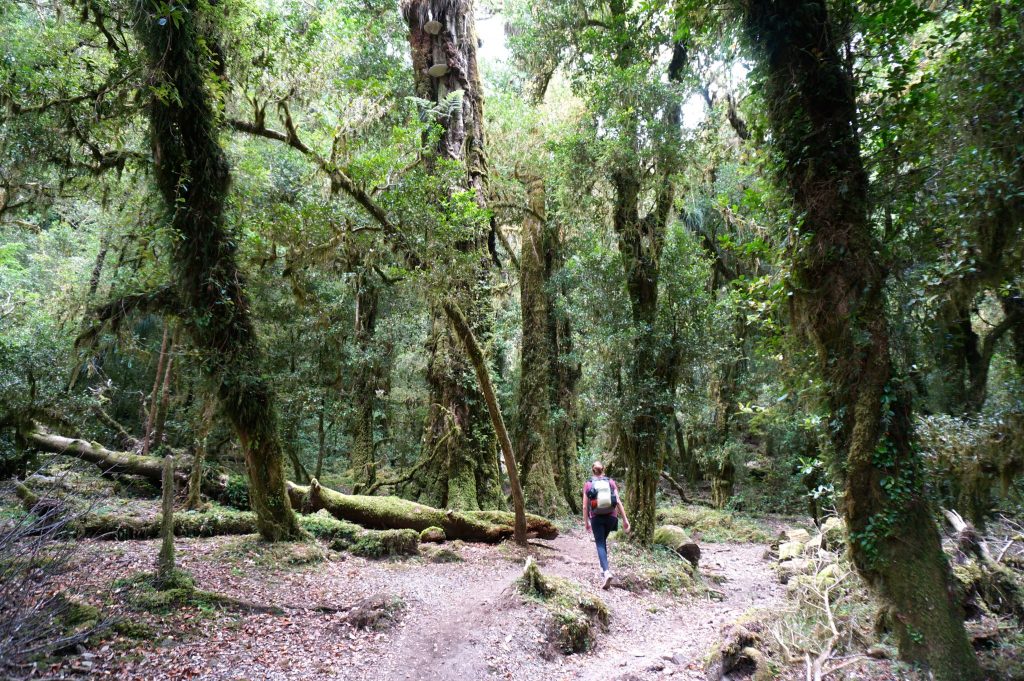
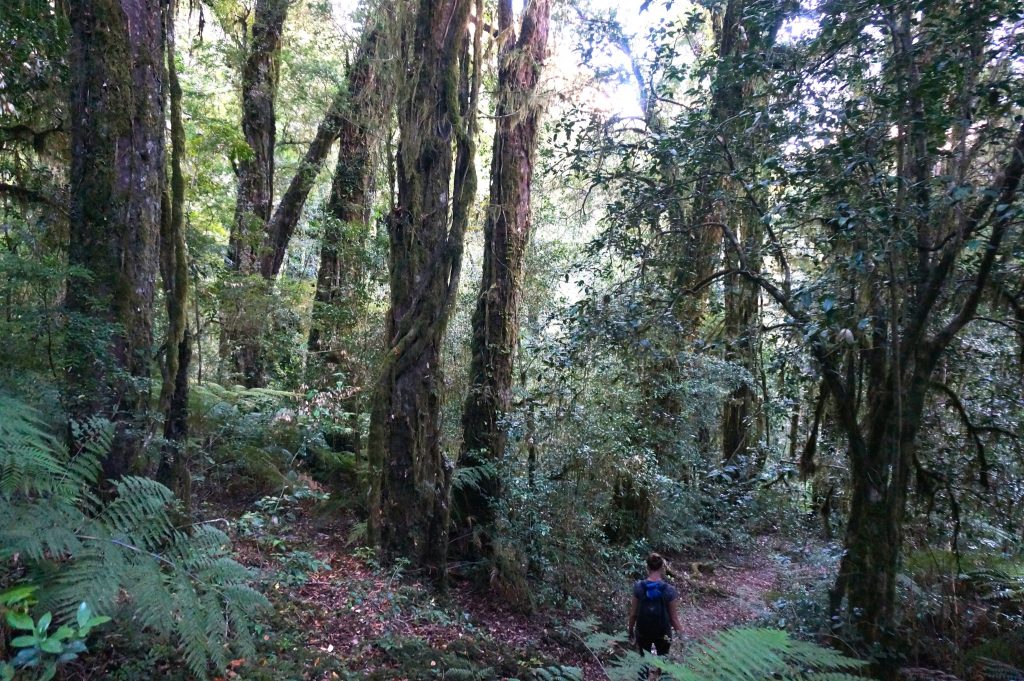
The hike starts out in a dense and humid forest. The Arco Iris trail is pretty easy to follow. There are just a few false trails that crisscross the way, but with a careful eye or a little backtracking, you can easily determine the correct way to go. The grade is pretty steep. Consider stopping at one of the occasional bamboo plants to grab a piece or two that you can use as trekking poles.
Keep your eyes out for the birds fluttering through the thick forest. And although your knees and your shortness of breath may be feeling the gain in altitude, it’s not evidently apparent due to the lush forestry that surrounds combined with the warm and sticky air that surrounds.
Lets Get Physical
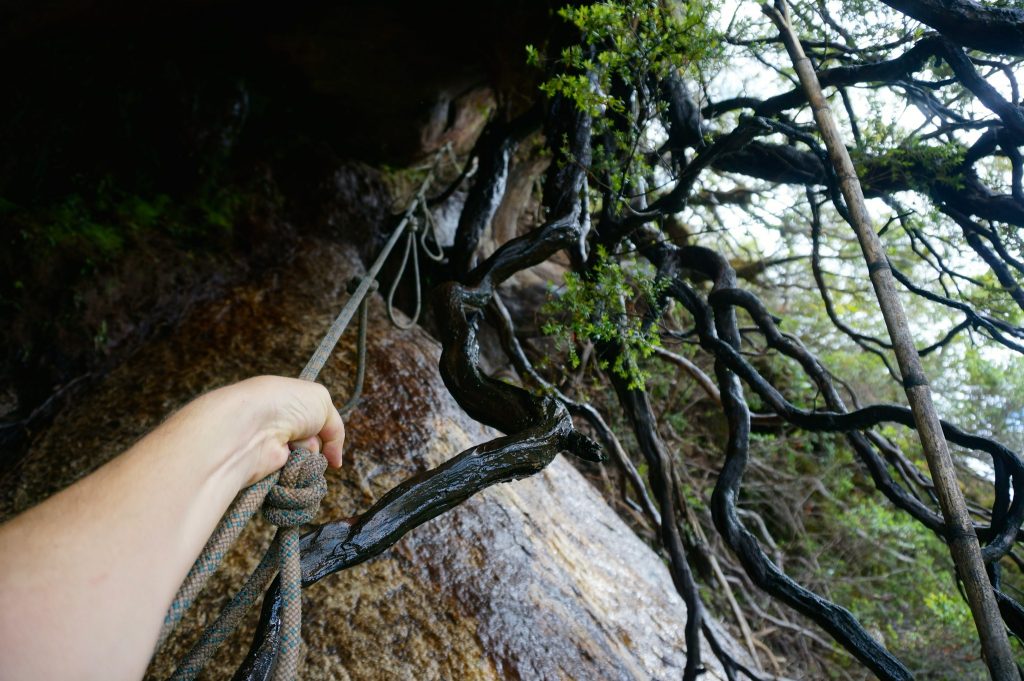
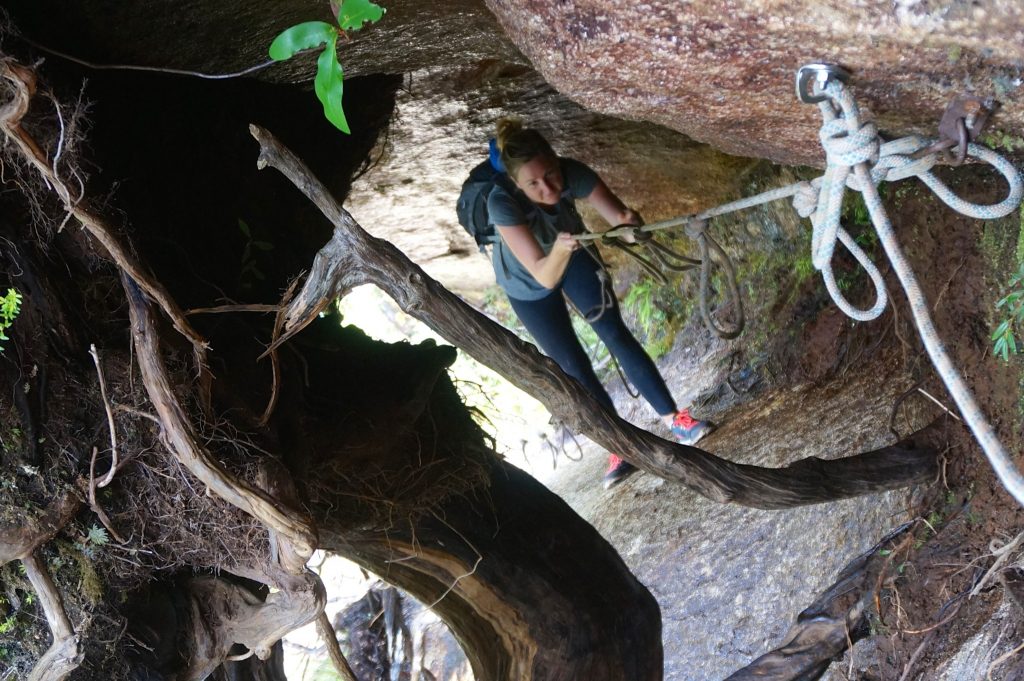
After about two hours, you will begin to see some ropes to assist you in some of the steeper sections. Consider ditching your bamboo walking stick(s) at this point, as it may hinder you during the remaining ascent. The hike will soon turn a bit more technical.
During a few short stints you will need to use your upper body strength to hoist yourself up the nearly vertical terrain using ropes that are planted firmly in place. Be careful on a few of the sections in which dripping water creates a slippery surface and note the steep drop-offs on the side. Utilize protruding tree roots to help boost yourself up. Just get a good grip and hang on tight!
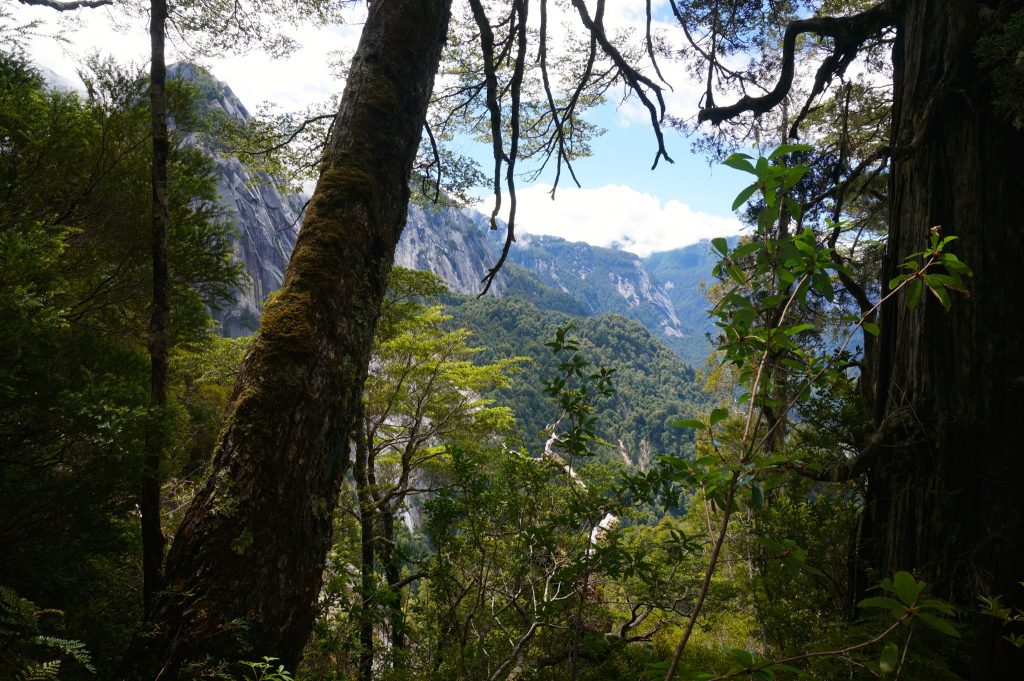
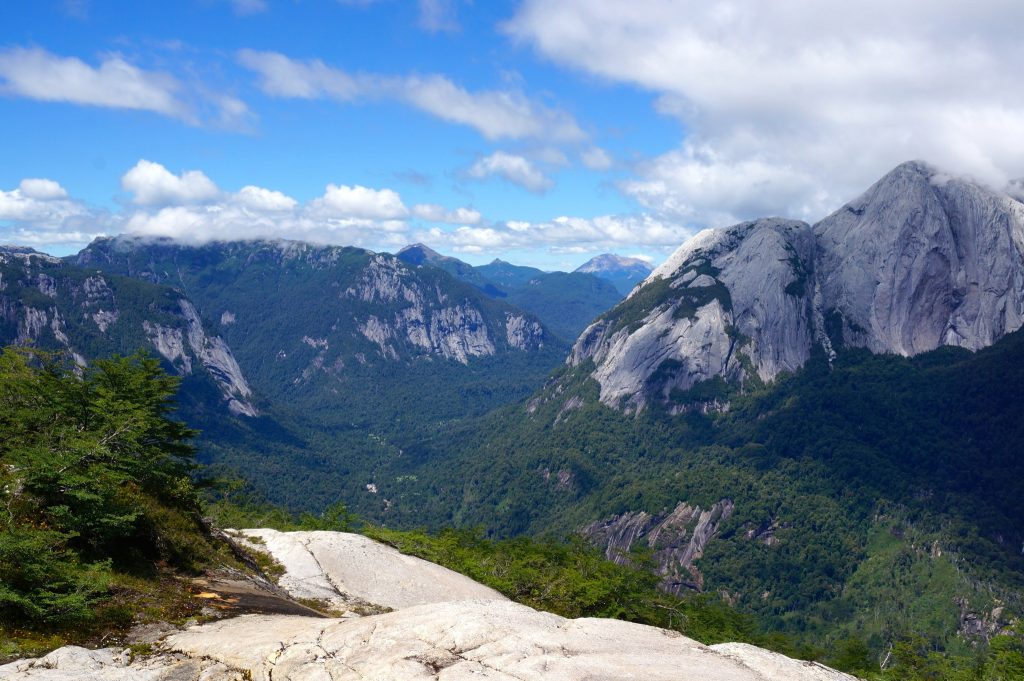
By this point, breaks in the trees will begin to reveal the beautiful valley below and the surrounding granite towers of the Río Cochamó Valley. There will be much better panoramas to come soon though, so no need to spend too much time gawking at these pretty vistas through the windows created by tree branches.
After a little more hiking and a few more ropes to hoist yourself up with, you will reach the first mirador (view point). Enjoy it, but just realize that the fun has only begun.
Time for a Climb!
If the steep grade and the treacherous cliff sides have started to make you a little uneasy, this may be a good place to soak in the views and consider turning back. But if you’re surefooted and fit for the challenge, we’d strongly encourage foraging onward.
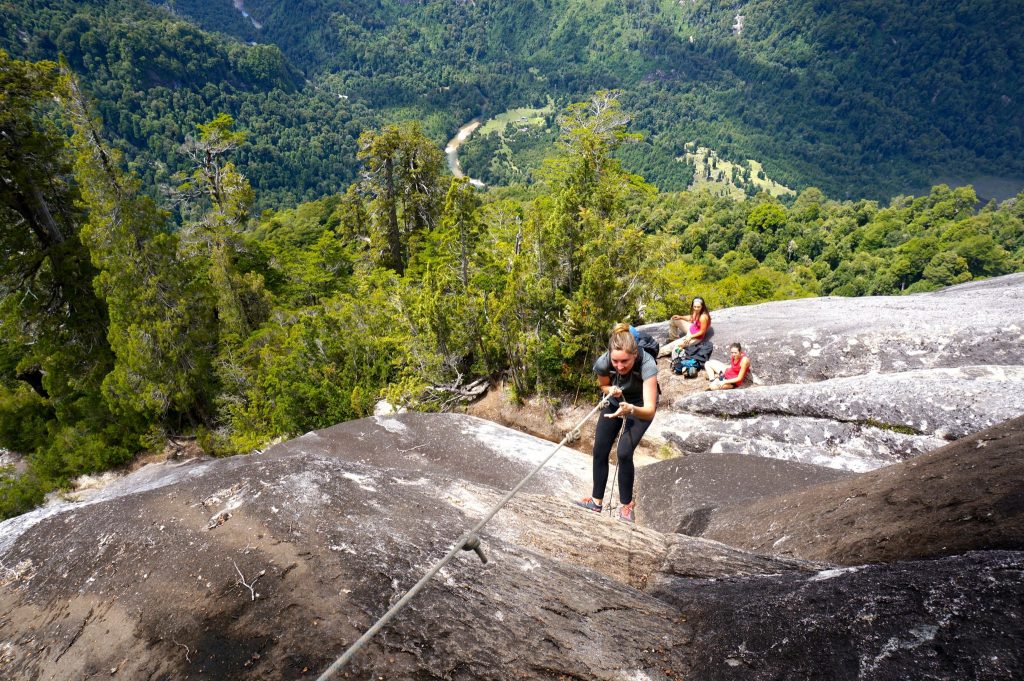
Continuing further, you will notice a series of ropes that are probably the longest yet. This time you’re pulling yourself, not up a trail, but up barren rock face. Again, you are not clipping in. Its a free climb. Knots in the rope allow you places to get a good grip. This section is probably a good testing grounds for whether you want to continue the hike or not.
Once you’ve hoisted yourself up the rock face, the trail continues again through more forest. The previous rope sections were actually a bit misleading as what is to come. Now the trail becomes less technical yet still pretty steep, steadily climbing a series of switchbacks. During this portion of the trek be sure to notice the absolutely enormous trees, almost reminiscent of a mighty Redwood forest. These are the largest trees we’ve seen throughout our three-month stint in Southern South America.
After a bit more than an hour hiking through this section, you eventually exit the last of the forest and pop out onto open rock face exposing yet another stunning view, for a higher vantage point. Being about 3-4 hours into the hike, this would be a great place to perhaps stop for lunch while marveling at the jaw-dropping surroundings. The view below to the Cochamo Valley really provides some good perspective on just how far you’ve climbed from the valley floor below!
This is another point to consider whether or not to continue onward. The final stretch is quite technical, very steep, a bit dangerous in parts, and the trail is much less defined. Actually, there is no “trail,” in the traditional sense, from here.
Follow the Rocks and Don’t Look Down
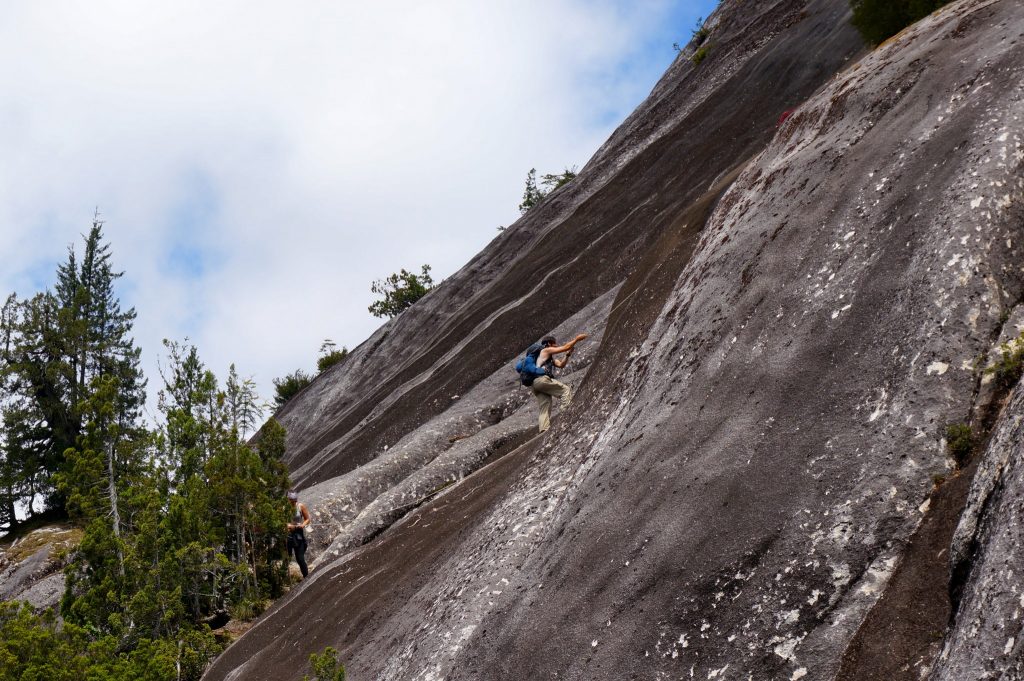
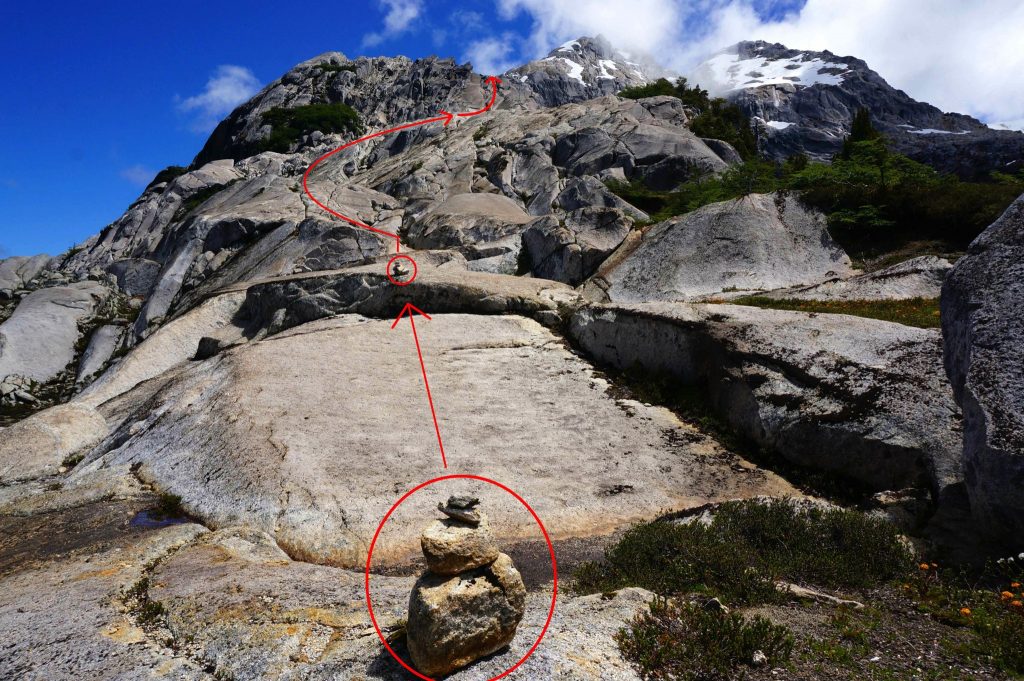
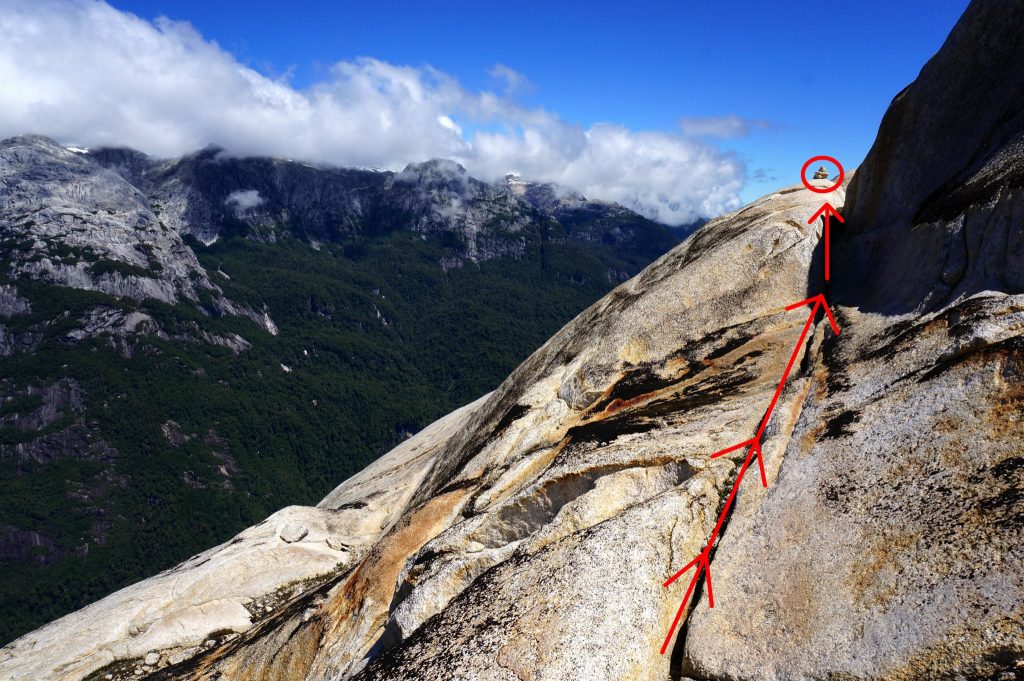
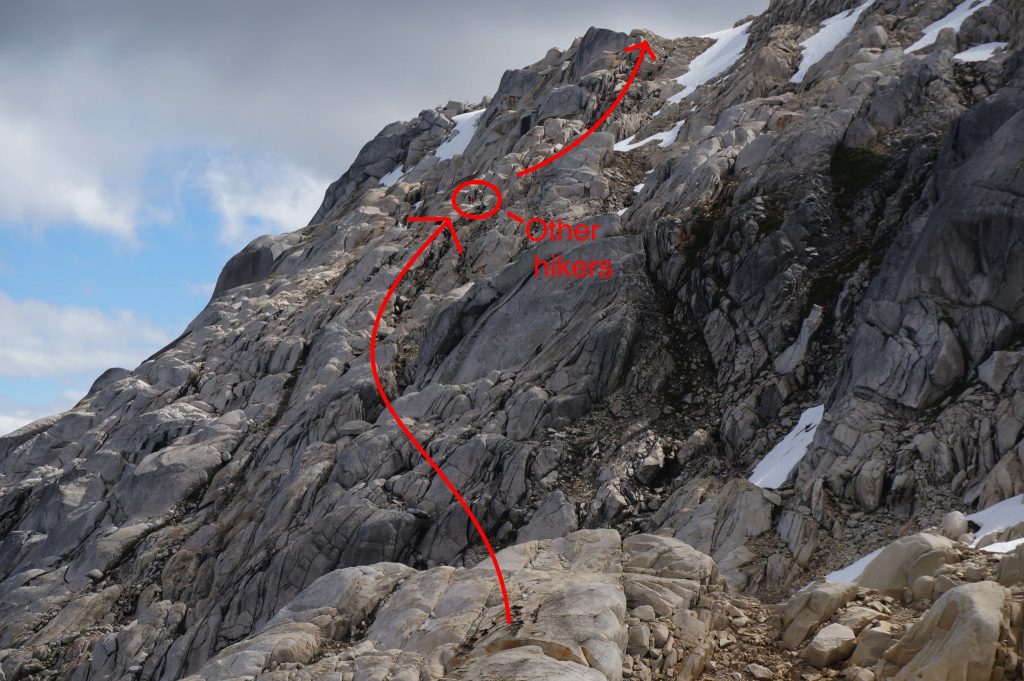
Instead, stacks of rocks mark your route. From this mirador, look for a stack of rocks. Once there, find the next stack of rocks and move on to there. You will continue this pattern for this entire last section, climbing up further and further. Be sure to follow these rock stacks, as other routes may lead you into very treacherous situations.
Now there are no ropes to assist you during this section that at times is just as steep as the sections with ropes. In place of the ropes, you simply must pull yourself up and over the massive boulders that come between you and the next set of rock stacks marking the way. Be cautious and careful. A slip this far up in the trail could become a disaster.
The climb now spans over large granite rock faces. The air is noticeably less humid and the dense forest is now a distant memory. Every glance outward offers a stunning view. And every boulder you rest on becomes another memorable viewpoint. Sometimes glancing outward during these stretches may bring on a sense of vertigo. But perhaps it is warranted to remind you to be extra careful, noting the sheer drop-offs below.
Summer Snow Fields
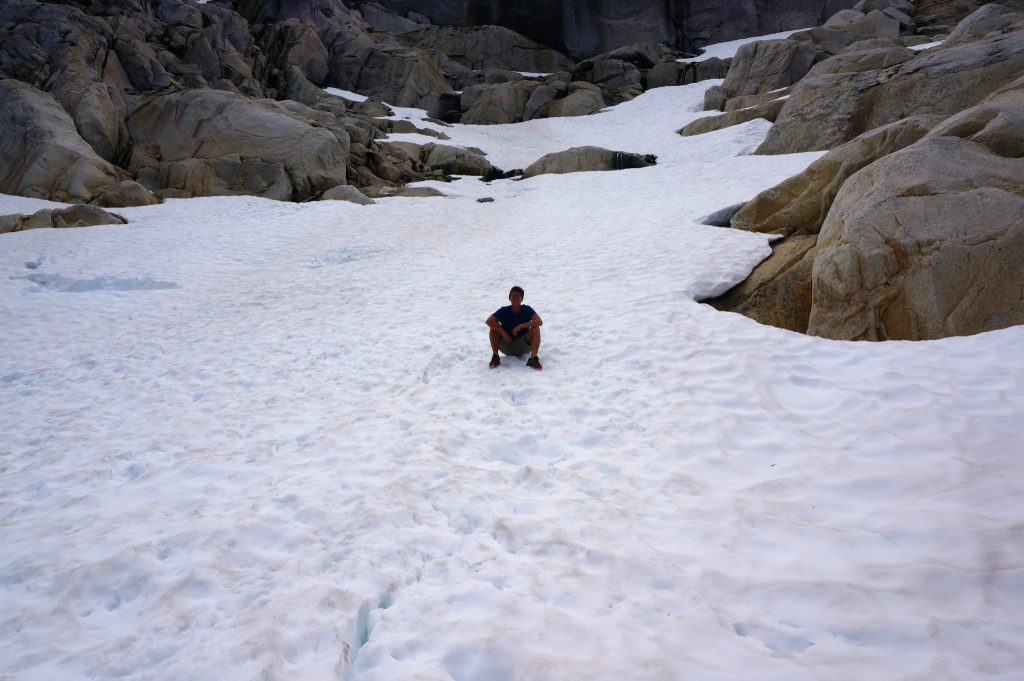
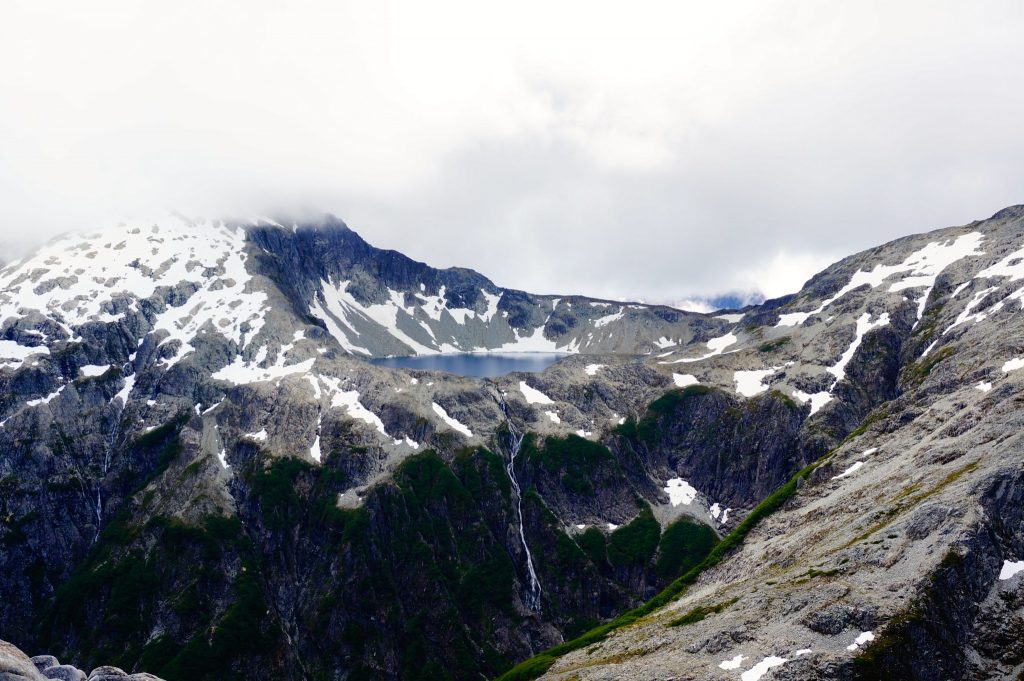
You will eventually see small patches of snow and ice. A bit further up, you will reach massive snowfields that hug the side of the mountains. It was a bit surreal to be in this icy environment yet still completely comfortable in shorts and t-shirts as the weather was quite pleasant during a January summer afternoon. Here, you will need to traverse over a few of these glaciers, yet we didn’t find the use of crampons was needed. Just be careful!
It’s about this point where you will finally come to your first water source. Small streams from the melting ice provide a most cool, clean, and refreshing drink of water. This is the place to fill up those empty water bottles.
The Final Insane Summit to Arco Iris
The end and summit of Arco Iris is only another 30-minute climb from here and perhaps contains the most technical sections yet. If you’ve made it this far, you should have no problem completing the final stretch. But it’s very easy to grow complacent and make what could be a fatal mistake. I can’t stress enough to be aware, be cautious, and follow the rock pile markers.
This trek is only dangerous if you carelessly make it so. Here, it is very easy and not advised to stray from the marked route. Some false ascents may seem clear but in actuality are not. And are likely quite dangerous! Keep to the rock piles, one to the next. If you don’t see the next one, pause and look for it. Or consider backtracking.
One of the Most Beautiful Scenes in Patagonia
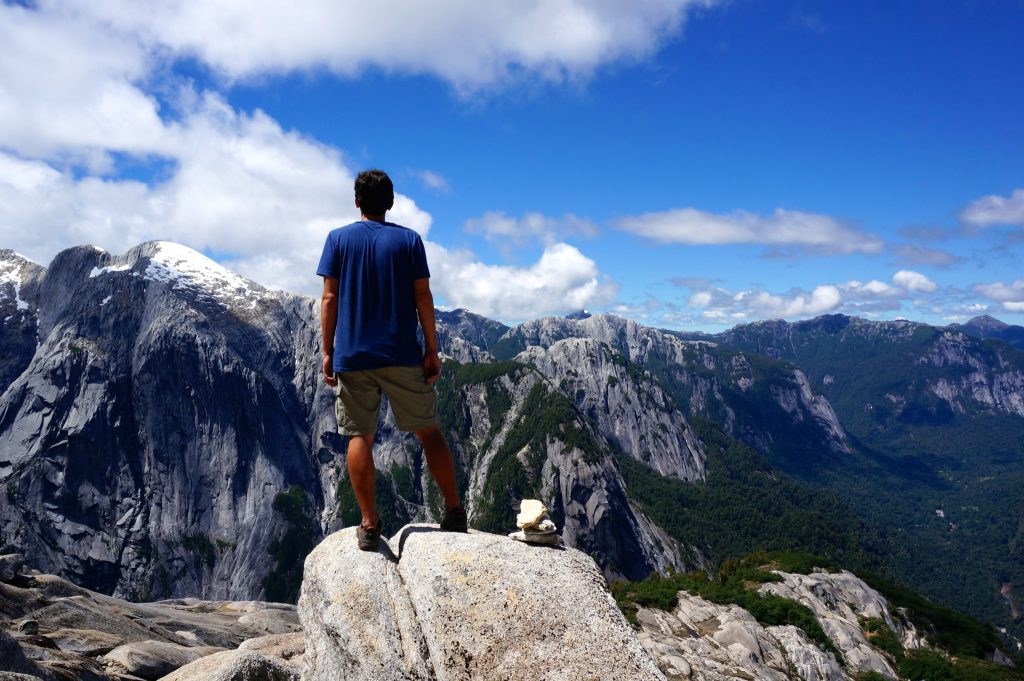
You will know that you’ve reached Arco Iris’s final mirador when you get to a point that opens up to a 360-degree panoramic view. The previous views only provide half the vantage point. Now revealed are an entire new section of mountains with beautiful alpine lakes and towering waterfalls streaming down below.
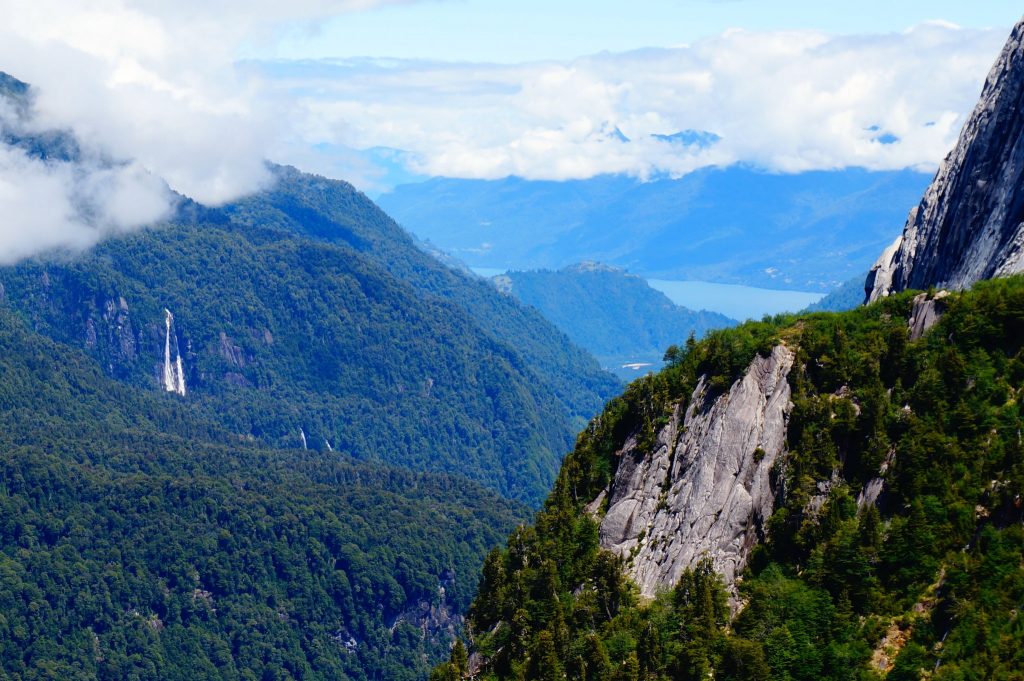
On a clear day, you can see the impressive granite towers down into the valley and beyond to the fjords in the distance that connect to the Pacific Ocean. It is all a most impressive vista and worth every bit of the sometimes fear-inducing ascent.
Its extremely difficult to even describe the impressive views from here and photos can never do justice to 360-degree vantage points. This may be one of the most beautiful views in Patagonia and definitely one of the most rewarding. Yet sitting here atop Arco Iris, you may begin to contemplate, which was more spectacular: this visual reward or the crazy fun route to get here?
Returning to La Junta and Cochamo Valley
As you’re soaking in this view, just be sure to keep an eye on your watch, so that you can allocate enough time to get back down. You must slowly and safely crawl much of the way down, so it takes nearly about the same time as the ascent. You definitely don’t want to get stuck up here at dark so plan accordingly.
The trek up Arco Irish is a very long hike, so it probably wouldn’t be an awful idea to bring along a flashlight, just in case. But try to plan accordingly so you aren’t racing against the sun in a battle to see who gets down first. You may loose.
If You Go To Hike Arco Iris:
Getting to Río Cochamó Valley by Bus
The trailhead is accessible from a 2-3 hour bus ride from Puerto Montt and Puerto Varas. We opted for the latter, since it is closer and that is where we were staying. But the bus had already filled up where it originated in Puerto Montt, which we later heard is common. So if you really don’t like standing in cramped busses, consider leaving from Puerto Montt instead.
The bus timetable from Puerto Varas and Puerto Montt to Cochamó varies so frequently that it is not even worth posting what it was during our trip out there. It had already changed again from when we left to when we returned. Instead, just ask around Puerto Montt or Puerto Varas.
At the point where the bus drops you off, there’s a man with a plan and a van who can drive you up the boring 7 km dirt road to the trailhead.
What to Bring on the Arco Iris Hike
For the day of the Arco Iris hike pack some lunch and water. Carry plenty of energy-boosting snacks with you too. Bring a minimum of 1.5 liters per person to get you to the first water access point, which is near the summit. If you plan to turn around before then, you may want to consider bringing even more water. Despite the pics of snow near the summit, this can be a very hot and strenuous hike that you’ll need plenty of hydration to tackle. Also consider bringing sunscreen and a long sleeve shirt.
Be Careful
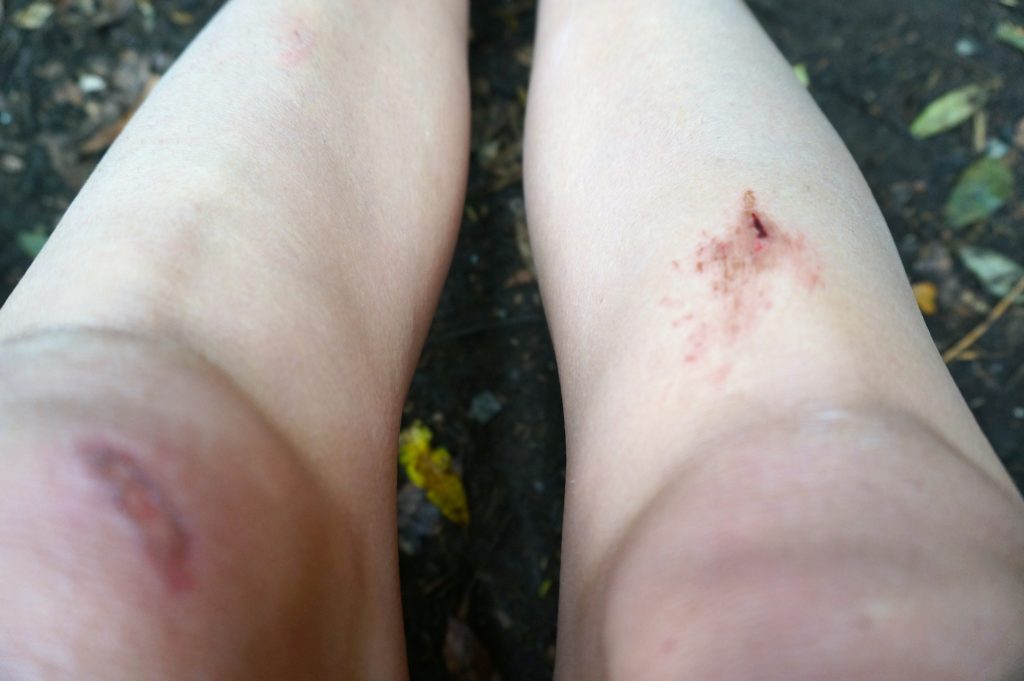
I can’t stress enough to use good safety and judgement while on this very treacherous trail. We sustained some minor injuries but anything worse could be disastrous due to the remote location of this hike. The Arco Iris trek is for fit and experienced hikers and climbers only. A good litmus test is whether or not you became tired on the hike in to Cochamo Valley. If so, you may just want to go to the first mirador of Arco Iris and see how you feel.
Food at La Junta and the Río Cochamó Valley
You can purchase some lunches and dinners at the Cochamó Refugio, otherwise plan to bring all of your food with you. We can attest that the pizza was good.
Cochamó Refugio also provides their guests with a simple yet filling breakfast of hearty bread with butter, jams, & manjar, with tea or coffee.
Prices to Stay in the Río Cochamó Valley
The cost to stay in one of Cochamó Refugio’s two private room is 39,000 pesos (sleeps 2) while a dorm bed will run you 15,000 pesos per person, both including breakfast (high season prices). This place tends to book up in advance, so be sure to book ahead, particularly if you’re trying to snag one of those private rooms during high season: Dec 21 – Mar 20.
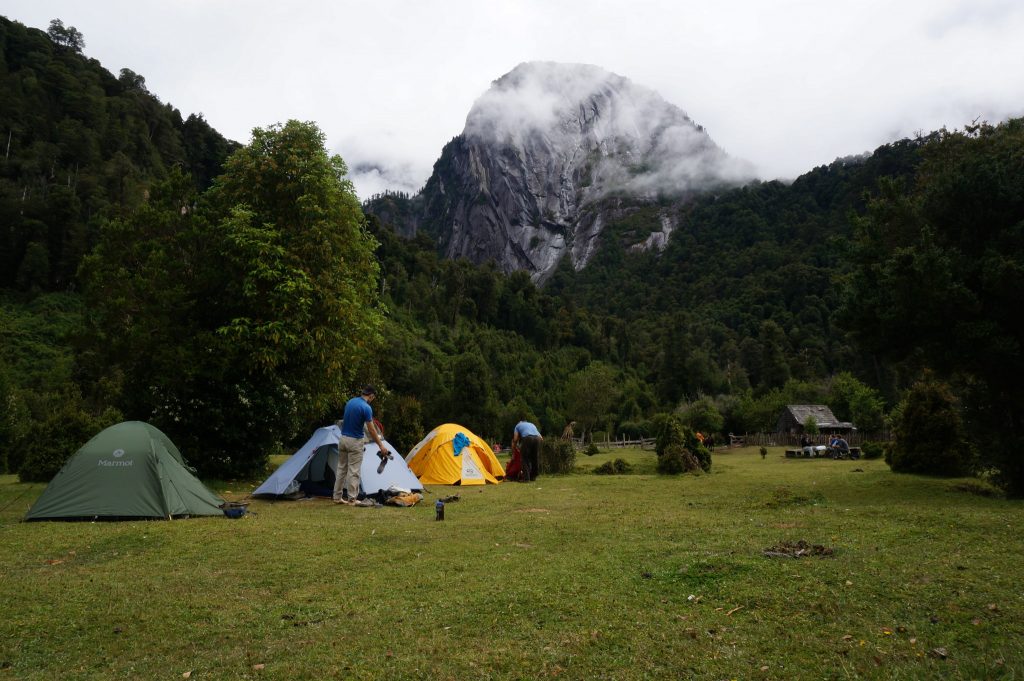
The La Junta campground is 4,000 pesos per night. Be sure to bring all of the gear needed with you, of course. We stayed in the refugio but this was a beautiful campsite. Just imagine waking up to this view in the morning.
How Long to Stay in the Río Cochamó Valley
Although you need a minimum of three days to hike Arco Iris, we strongly recommend considering at least 4 days, staying three nights in the Cochamó Valley. Weather changes often here and you will not want to attempt the summit during averse weather conditions. An extra day will give you a greater chance to give it a go.
Additionally, we found the Arco Iris trek to consume the entire day and be extremely draining. Needing to depart the Cochamó Valley early the next morning to catch our bus back, left us no time to enjoy and explore this beautiful area more. Consider 4+ days. Its really a special place where you’ll want to spend some additional time.
And if you’re a climber, this will be paradise for you. Consider a week or longer.
Map and Route to Cerro Arco Iris
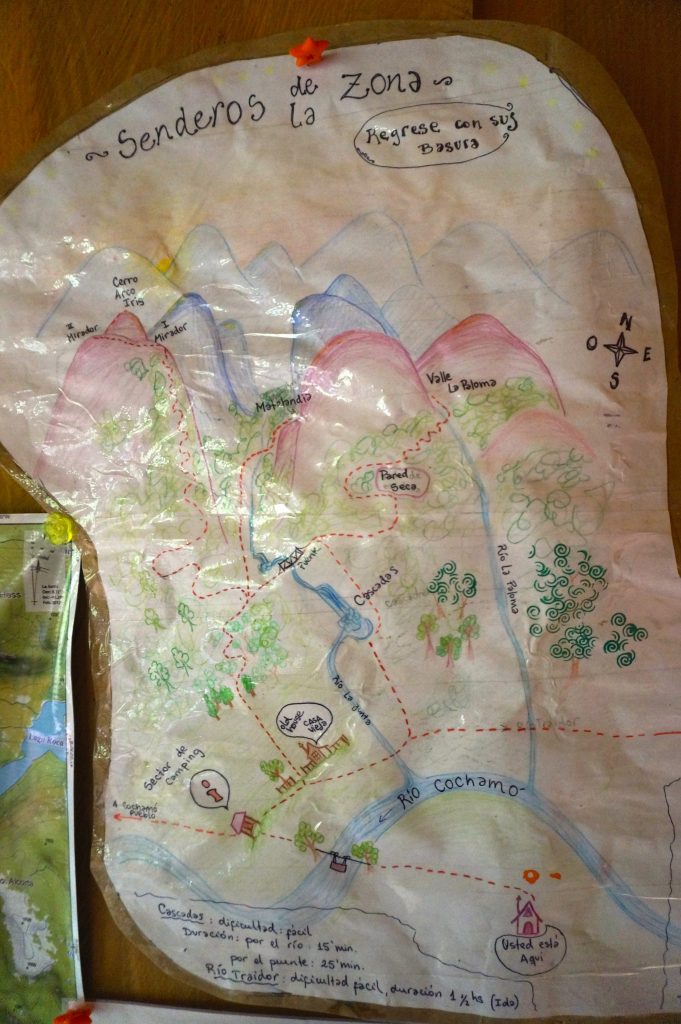
We couldn’t find any good maps to Arco Iris. At the Refugio Cochamo there was a hand drawn map that was not at all to scale but at least provided some idea of what to expect. See below.
Parting Advice
Lastly, have fun and enjoy this most amazing hike!




Hi!
We are trying to reserve three nights of camping or in the refugio but the website doesn’t seem to be working – how did you guys get in contact with them?
Hey Kelley- sorry to hear about your troubles with booking a campsite or room. At our time of visit, we had a prompt response via email confirming our reservation. I went back an looked at my old email reservation and here’s the contact info I have:
[email protected] and also [email protected]
I hope this helps!
Hey, We’re there other hikers around the path? I’m planning on doing it alone. I’m fine hiking alone, but I like the peace of mind if I know that other people are at least a couple months miles away.
Hey MK! We encountered two other hiking parties during this particular trek. Arco Iris is an incredible trek and still one of my favorites to date. Enjoy!
Thanks for the tips, very helpful for an upcoming adventure.
Hey Lee, thanks for the comment! We’re thrilled that you found our information helpful. Please let us know how your trip goes!
Whoa! That is off the charts for me. I’ve never tried doing anything close to what you did, much less in one trip.
Neither had we. We honestly had no idea what we were in for when we began the hike! But it was a blast.